Nuxt.jsでMarkdownなブログのつくりかた
| 日時 | 内容 |
|---|---|
| 2020-05-27 |
|
| 2020-07-30 |
|
目的 見出しにジャンプ
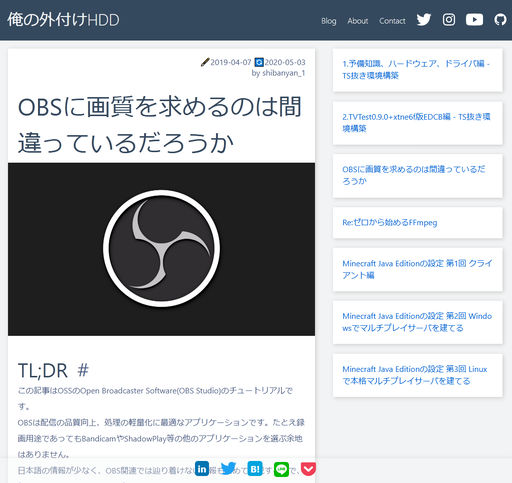
これまではてなブログを使っていたが、
- 遅い
- レイアウトの自由度が低い
- 記事の投稿・更新までのワークフローが面倒
- 10万文字を超えるとembedがパースされない不具合
- Markdownでolを書くとき、間にpreやembedが入ると連番がリセットされる(ずっと1.)問題
- Google AdSenseの審査に失敗する
といった理由で移行先を探していた。
Proユーザでもないのに文句を言う筋合いもなく、何より私を成長させてくれた場に感謝している。
QiitaやDEVという選択肢もあるが、ポートフォリオ的な意味合いも込めて、自分のドメインで、1から[要出典]サイトを構築することにした。
技術選定 見出しにジャンプ
昨年、こんなツイートを見かけてNuxtの存在を知った。
大学祭ホームページメイン使用技術一覧
— 𝚎𝚖𝚊𝚍𝚞𝚜 (@emadus_FTI) October 10, 2019
- 筑波大: SSR / Nuxt
- 駒場祭: SSR / Nuxt
- 東工大: static / Vanilla
- 早稲田祭: SSR / Nuxt
- 三田祭: static / jQuery
- 一橋祭: static / jQuery
- 外語祭: WordPress / jQuery
- ソフィア祭: Wix / React
- 徽音祭: static / jQuery
「Nuxtすごい」これが昨年の時点での私の感想だ
「Nuxtはいいぞ」これが現時点での私の感想
-
記事の執筆
- Markdown(.md) こっちの資産がある(修正しないといけないものが多いが...)
- reStructuredText(.rst) 凄いけどないかな
-
UIフレームワーク
- 俺 が書くことにした
- Bootstrap Twitterが出してるやつ、よく見るアレがコレか~ってなったが最小構成で行きたいので却下
なんとなくVue.jsのUIフレームワークを紹介する - Qiita
Getting Started | BootstrapVue
-
バックエンド
- Nuxt.js これを使いたいの!
Nuxt.js - The Intuitive Vue Framework
nuxt/nuxt.js: The Intuitive Vue Framework - VuePress 「ブログをつくる」には良さそう、ただやっぱりNuxtでやりたい
VuePress をお試ししてみた - Qiita
VuePress vs Nuxt.js - Vue Mastery - Medium
Getting Started | VuePress - Hugo 良さそう、ただし今回はパス。独自規格は却下というスタンスながらFrontmatterを採用したのはHugoでも使えるから
- Nuxt.js これを使いたいの!
-
PaaS
- Heroku 今のところ必要十分そうなのでこれ使う。
git push heroku masterでデプロイ(記事投稿・更新)できるのはとてもえっちだと思った。 - Contentful Nuxt.jsを進める中でチラチラと出てきたが却下
- AWS S3 いつかやる
- Heroku 今のところ必要十分そうなのでこれ使う。
-
SSL
- Cloudflare
- Let's Encrypt
「Heroku(PaaS)上でホスティングされたNuxt.jsな爆速ブログをつくってはてなブログ(SaaS)から移行する」
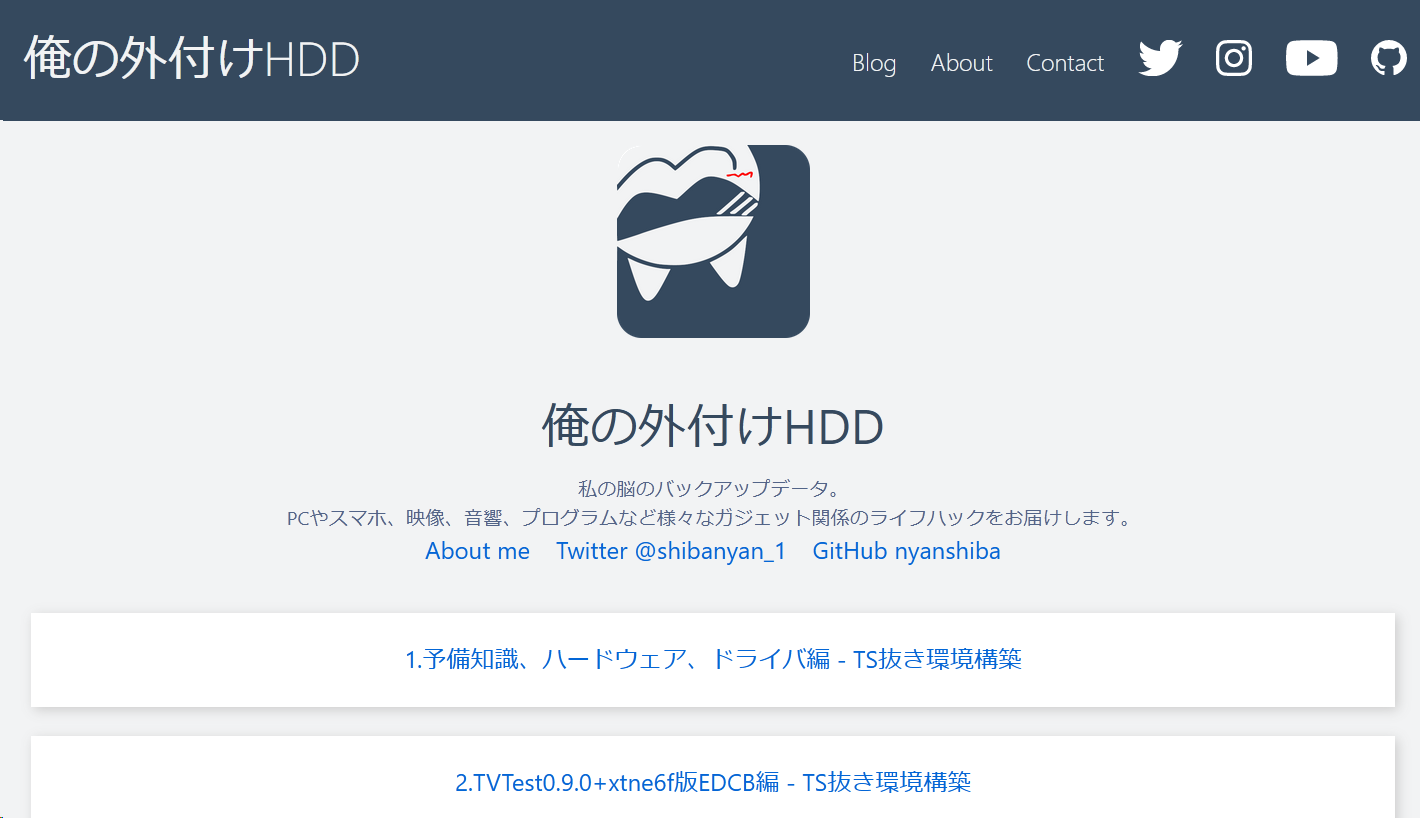
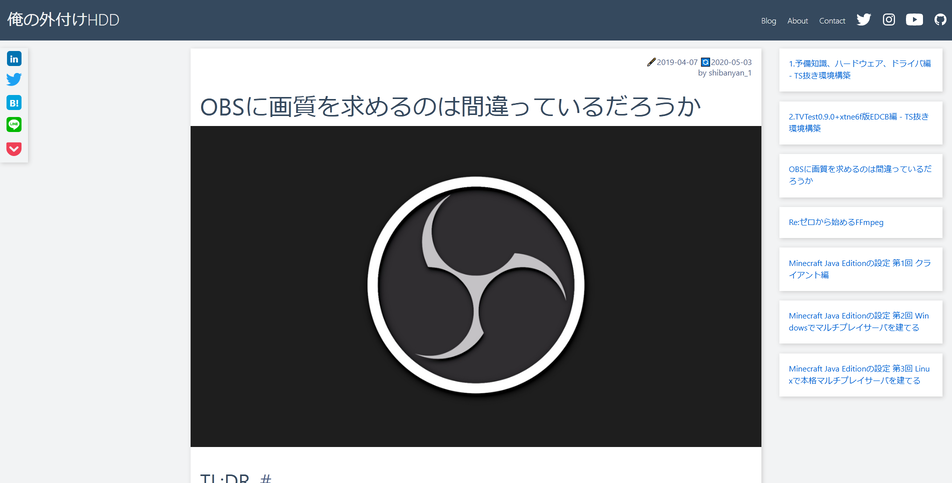
完成したもの 見出しにジャンプ
結論から申し上げますと、
これです。
これNuxtです!
因みに、俺の外付けHDDのNuxtjs版とはてなブログ版をPageSpeed Insightsで比較すると...
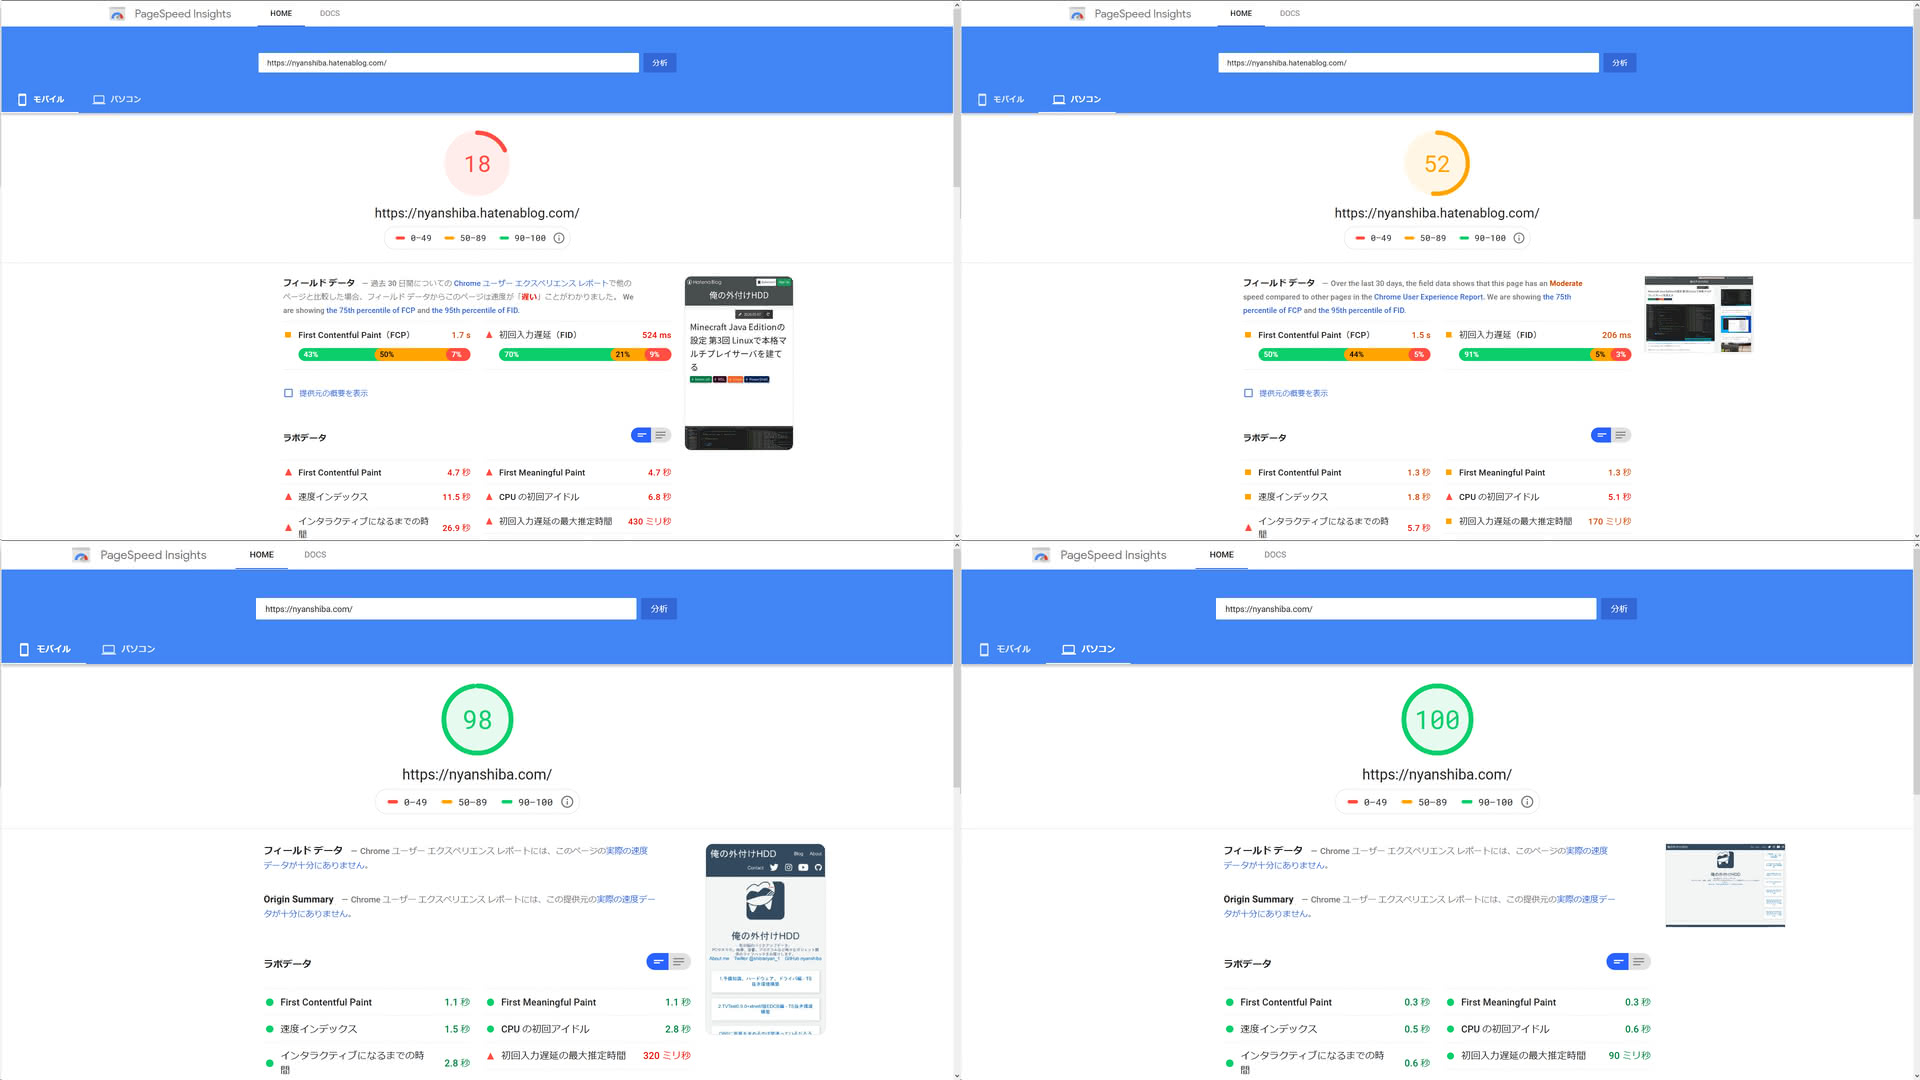
100点ってヤバイですね☆
開発環境 見出しにジャンプ
Windows側で一々環境構築していては負債になるのは自明なので、WSL(Ubuntu)上のGit、Heroku CLI、npm環境をVSCode Remote Developmentから触る。
WSL, Git, VSCodeの解説はここではしない。
npmのインストール 見出しにジャンプ
sudo apt install npm
npx create-nuxt-appでNuxtjs環境をインストール 見出しにジャンプ
Installation - NuxtJS
インストール - NuxtJS
npmでvue-cliなどを一つ一つインストールする必要はありません。
npx create-nuxt-app nuxt-myexternalhdd
この場合、nuxt-myexternalhddリポジトリはカレントディレクトリ直下に生成されるので、
普段お使いのGitリポジトリのルートディレクトリや、ホームディレクトリ等で実行します。
最終的には、ここで作成したリポジトリをHerokuへpushすることになります。
カレントディレクトリ
+--nuxt-myexternalhdd
|  +--assets
|  +--components
|  +--layouts
|  +--middleware
|  +--node_modules
|  +--pages
|  +--plugins
|  +--static
|  +--store
|  +--nuxt.config.js
|  +--package-lock.json
|  +--package.json
|  +--README.md
初期設定、インストールするパッケージを選択します。
ここで入れそびれたパッケージはnpm install パッケージ名で後からインストールできます。
create-nuxt-app v2.15.0
✨  Generating Nuxt.js project in nuxt-myexternalhdd
? Project name nuxt-myexternalhdd
? Project description My geometric Nuxt.js project
? Author name nyanshiba
? Choose programming language JavaScript
? Choose the package manager Npm
? Choose UI framework None
? Choose custom server framework None (Recommended)
? Choose Nuxt.js modules None
? Choose linting tools ESLint
? Choose test framework None
? Choose rendering mode Universal (SSR)
? Choose development tools jsconfig.json (Recommended for VS Code)
数千年の時が流れーー
> nuxt@2.12.2 postinstall /mnt/c/Repository/nuxt-myexternalhdd/node_modules/nuxt
> opencollective || exit 0


                            :-:
                          .==-+:
                         .==. :+- .-=-
                        .==.   :==++-+=.
                       :==.     -**: :+=.
                      :+-      :*+++. .++.
                     :+-      -*= .++: .=+.
                    -+:      =*-   .+*: .=+:
                   -+:     .=*-     .=*-  =+:
                 .==:     .+*:        -*-  -+-
                .=+:.....:+*-.........:=*=..=*-
                .-=------=++============++====:

                 Thanks for installing nuxtjs
        Please consider donating to our open collective
               to help us maintain this package.

                  Number of contributors: 229
                     Number of backers: 321
                     Annual budget: $72,688
                    Current balance: $29,699

> nuxt-myexternalhdd@1.0.0 lint /mnt/c/Repository/nuxt-myexternalhdd
> eslint --ext .js,.vue --ignore-path .gitignore . "--fix"


🎉  Successfully created project nuxt-myexternalhdd

  To get started:

        cd nuxt-myexternalhdd
        npm run dev

  To build & start for production:

        cd nuxt-myexternalhdd
        npm run build
        npm run start
インストール完了!
npm ERR! request to https://registry.npmjs.org/npm failed, reason: getaddrinfo EAI_AGAIN registry.npmjs.org:443 見出しにジャンプ
DNSサーバを1.1.1.1なり9.9.9.9なりに変えよう
getaddrinfo EAI_AGAIN registry.npmjs.org error while npm install #16661
Nuxtjsを実行 見出しにジャンプ
Commands and Deployment - NuxtJS
コマンド - NuxtJS
https://qiita.com/rainbow___0/items/a5799fe2d0c9d4e611ab
ホットリロード(ファイルの変更を監視してリアルタイム反映するモード)でデプロイ(デザイン調整や記事執筆時に使える)
cd ./nuxt-myexternalhdd
npm run dev
Ctrl-Cで終了
SSR(Server-Side Rendered)でデプロイ(Heroku側でやること、使っても最終確認くらい)
cd ./nuxt-myexternalhdd
npm run build
npm run start
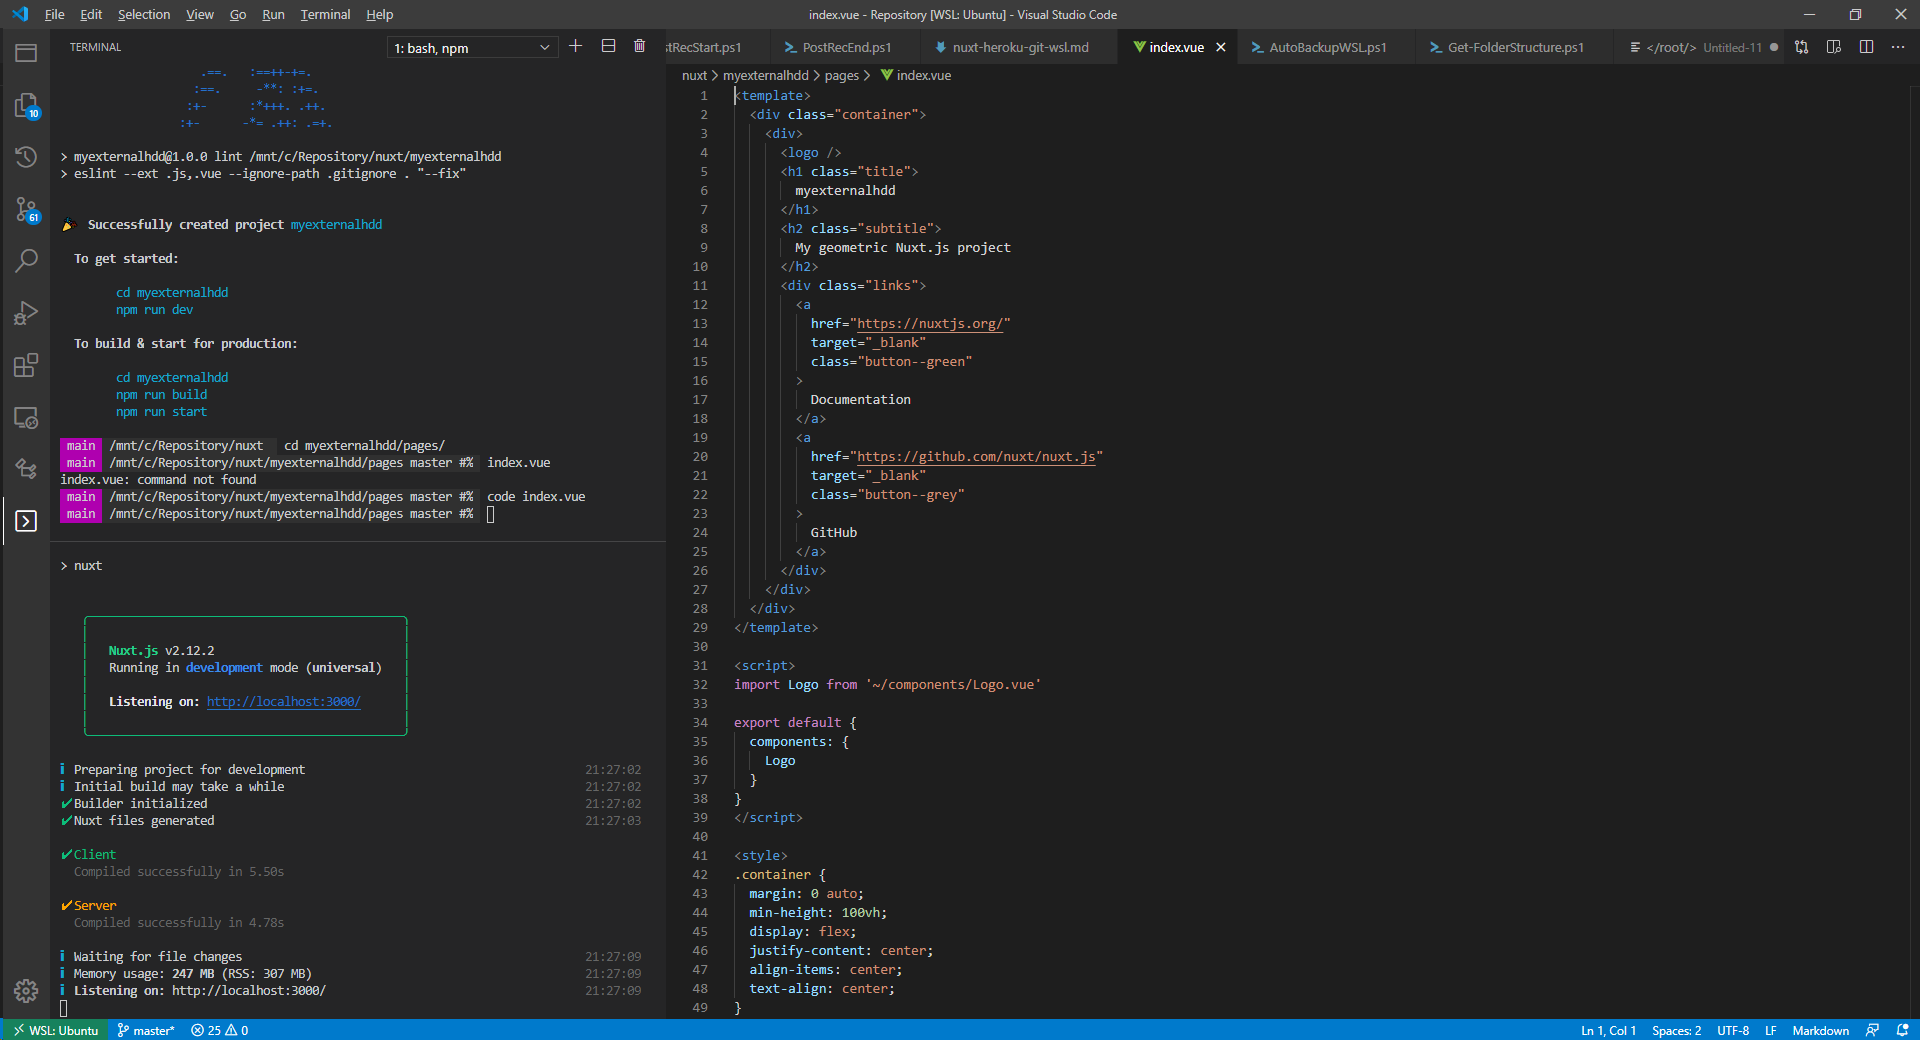
npm run dev

> myexternalhdd@1.0.0 dev /mnt/c/Repository/nuxt/myexternalhdd
> nuxt


   ╭─────────────────────────────────────────────╮
   │                                             │
   │   Nuxt.js v2.12.2                           │
   │   Running in development mode (universal)   │
   │                                             │
   │   Listening on: http://localhost:3000/      │
   │                                             │
   ╰─────────────────────────────────────────────╯

ℹ Preparing project for development                                        21:27:02
ℹ Initial build may take a while                                           21:27:02
✔ Builder initialized                                                      21:27:02
✔ Nuxt files generated                                                     21:27:03

✔ Client
  Compiled successfully in 5.50s

✔ Server
  Compiled successfully in 4.78s

ℹ Waiting for file changes                                                 21:27:09
ℹ Memory usage: 247 MB (RSS: 307 MB)                                       21:27:09
ℹ Listening on: http://localhost:3000/                                     21:27:09
npm run build

> myexternalhdd@1.0.0 build /mnt/c/Repository/nuxt/myexternalhdd
> nuxt build

ℹ Production build                                                                              11:41:05
✔ Builder initialized                                                                           11:41:05
✔ Nuxt files generated                                                                          11:41:05

✔ Client
  Compiled successfully in 5.16s

✔ Server
  Compiled successfully in 967.20ms


Hash: a08dc985cf488567b90b
Version: webpack 4.43.0
Time: 5157ms
Built at: 05/09/2020 11:41:11 AM
                         Asset       Size  Chunks                         Chunk Names
../server/client.manifest.json   10.2 KiB          [emitted]
       0e0c26e36a07d2cef4bc.js    106 KiB       5  [emitted] [immutable]  vendors.app
       0f45c94ef660ba0c5004.js   45.8 KiB       0  [emitted] [immutable]  app
       15d323dd07d8ef54b58f.js   2.33 KiB       4  [emitted] [immutable]  runtime
                      LICENSES  441 bytes          [emitted]
       a77b7f8cc234bf9a8ceb.js  829 bytes       2  [emitted] [immutable]  pages/hello
       b16c5da291ea8a10f1c8.js    165 KiB       1  [emitted] [immutable]  commons.app
       ccc929f311fc775b12e5.js   2.99 KiB       3  [emitted] [immutable]  pages/index
 + 2 hidden assets
Entrypoint app = 15d323dd07d8ef54b58f.js b16c5da291ea8a10f1c8.js 0e0c26e36a07d2cef4bc.js 0f45c94ef660ba0c5004.js

Hash: 8b5085e0b6631c74c32b
Version: webpack 4.43.0
Time: 968ms
Built at: 05/09/2020 11:41:12 AM
                  Asset       Size  Chunks                         Chunk Names
7fec399325b9c6357faf.js   3.07 KiB       2  [emitted] [immutable]  pages/index
e9b957a2d9bad492ca98.js  891 bytes       1  [emitted] [immutable]  pages/hello
              server.js     29 KiB       0  [emitted]              app
   server.manifest.json  203 bytes          [emitted]
Entrypoint app = server.js
http://localhost:3000/にアクセスすると

とりあえずvueで記事書いてみる 見出しにジャンプ
pages/hello.vueを作成し、
nuxt-myexternalhdd
+--pages
|  +--hello.vue
|  +--index.vue
下記を記述します。
<template>
  <h1 class="red">
    Hello!
  </h1>
</template>

<style>
.red {
  color: red;
  font-size: 16em;
}
</style>
http://127.0.0.1:3001/helloにアクセスすると

nuxtjs/markdownitでMarkdownで執筆できるようにする 見出しにジャンプ
Markdown Parser"markdown-it"をnuxtから利用できるようにしたものが@nuxtjs/markdownit。
# npx create-nuxt-appで生成されたディレクトリへ移動
cd /mnt/c/Repository/nuxt-myexternalhdd

# npmパッケージをインストール
npm install @nuxtjs/markdownit
nuxt.config.jsを編集して@nuxtjs/markdownitに対応させます。
linkifyで[]()や<a href=...を書かずhttp...とだけ書いてもパース時にリンクになってくれます。
markdown-it/markdown-it: Markdown parser, done right. 100% CommonMark support, extensions, syntax plugins & high speed
export default {
~~
  /*
  ** Nuxt.js modules
  */
  modules: [
    '@nuxtjs/markdownit',
  ],
  markdownit: {
    preset: 'default',
    linkify: true,
    breaks: true
  },
~~
}
pages/hello.vueに下記を記述して
- vue内にMarkdownを書く場合
<template lang="md">
  # hello.vue markdown

  Current route is: {{ $route.path }}
</template>

<style>
* {
    color: red;
}
</style>
- .mdを参照する場合
<template>
  <div v-html="hello"></div>
</template>

<script>
import hello from './hello.md'

export default {
  computed: {
    hello () {
      return hello
    }
  }
}
</script>

<style>
* {
    color: red;
}
</style>
# hello.md
Hello!
起動!
npn run dev
Require self-closing on HTML element 見出しにジャンプ
ERROR Failed to compile with 1 errors friendly-errors 22:46:56
ERROR in ./pages/hello.vue friendly-errors 22:46:56
Module Error (from ./node_modules/eslint-loader/dist/cjs.js):
/mnt/c/Repository/nuxt/myexternalhdd/pages/hello.vue
2:3 warning Require self-closing on HTML elements () vue/html-self-closing
2:8 warning 'v-html' directive can lead to XSS attack vue/no-v-html
4:1 error Trailing spaces not allowed no-trailing-spaces
7:7 error Missing space before function parentheses space-before-function-paren
13:10 error Trailing spaces not allowed no-trailing-spaces
✖ 5 problems (3 errors, 2 warnings)
3 errors and 1 warning potentially fixable with the `--fix` option.
friendly-errors 22:46:56
なんか書き方ダメってよ
eslint-plugin-vue/html-self-closing.md at master · vuejs/eslint-plugin-vue
<template>
<!-- ✓ GOOD -->
<div/>
<img>
<MyComponent/>
<svg><path d=""/></svg>
<!-- ✗ BAD -->
<div></div>
<img/>
<MyComponent></MyComponent>
<svg><path d=""></path></svg>
</template>
ご丁寧にeslintの--fixで直せるとのことなので実行
node_modules/.bin/eslint --fix pages/hello.vue
'v-html' directive can lead to XSS attack 見出しにジャンプ
/mnt/c/Repository/nuxt/myexternalhdd/pages/hello.vue
2:8 warning 'v-html' directive can lead to XSS attack vue/no-v-html
✖ 1 problem (0 errors, 1 warning)
Cross-Site Scripting (XSS) attacks 防止のため、書き方を変えなさいということらしい。
eslint-plugin-vue/no-v-html.md at master · vuejs/eslint-plugin-vue
<template>
<!-- ✓ GOOD -->
<div>{{ someHTML }}</div>
<!-- ✗ BAD -->
<div v-html="someHTML"></div>
</template>
<!-- ✗ Before -->
<template>
<div v-html="hello" />
</template>
<!-- ✓ After -->
<template>
<div>
{{ hello }}
</div>
</template>
しかしですね...
要するに全てエスケープされるので私が書いた素晴らしい文章のHTML構造まで文字参照に変わっちゃうんですね...
</style>
</head>
<body >
<div data-server-rendered="true" id="__nuxt"><!----><!----><div id="__layout"><div><div>
<section><h2>プロフィール</h2>
<h3>語るねこ</h3>
<p>地球暦2000年2月29日2時22分、白ヤモリ星 ね国 キャッ都で私「しばにゃん」は生まれました。<br>
諸事情によりインターネッツの世界に迷い込んだ私は、パソコンなる文明の利器を扱う魔術を習得するため、世界中のありとあらゆるStack OverflowやStack Overflow、またはStack Overflowを旅していました。<br>
そんな旅を続ける中で、私はある答えに辿り着きました。</p>
<p><strong>日本語の情報がない</strong></p>
なので正解は
<template>
<!-- eslint-disable-next-line vue/no-v-html -->
<div v-html="hello" />
</template>
記事作成の度にvueを増やしたくないんだけど 見出しにジャンプ
nuxtjs/markdownitでMarkdownで執筆できるようにしたものの、
.mdと一緒に毎度.vueを追加していかなければいけないのはブログとしては厳しいものがありますね。
更に、日本語対応の見出しと目次やmeta・OGP・faviconの設定、記事一覧に対応させるのでもこのvueが分かれていることが障壁になってきます。
- Markdown内で定義されたタイトルやmetaをfront-matterで切り離しーの
- タイトルやmetaを動的に設定
- シェアボタン
- それ以外のMarkdownな部分はHTMLにパース
- 日本語対応の見出しと目次に対応させて
- シンタックスハイライトを忍ばせる
Nuxtjsのダイナミックルーティング機能を使うわけです。
NuxtjsでMarkdownなブログを構築するにあたっての根幹になってきます。
nuxt-myexternalhdd
+--assets
+--components
+--dist
+--layouts
| +--default.vue
+--middleware
+--node_modules
+--pages
| +--about.md
| +--about.vue
| +--android-text-to-speech-on-windows.md
| +--android-text-to-speech-on-windows.vue
| +--auto-speedtest.md
| +--auto-speedtest.vue
| +--chrome-firefox-settings.md
| +--chrome-firefox-settings.vue
| +--diy-microphone-xcm6035.md
| +--diy-microphone-xcm6035.vue
| +--diy-shelf-desk.md
| +--diy-shelf-desk.vue
| +--dtv-edcb-twitter.md
| +--dtv-edcb-twitter.vue
| +--dtv-ffmpeg-encode.md
| +--dtv-ffmpeg-encode.vue
| +--dtv-hardware-driver.md
| +--dtv-hardware-driver.vue
| +--dtv-tvtest-edcb.md
| +--dtv-tvtest-edcb.vue
| +--ffmpeg.md
| +--ffmpeg.vue
| +--how-to-use-aviutl.md
| +--how-to-use-aviutl.vue
| +--index.vue
| +--low-price-external-hdd-wd100emaz.md
| +--low-price-external-hdd-wd100emaz.vue
| +--make-delicious-latte-at-home-with-makinetta.md
| +--make-delicious-latte-at-home-with-makinetta.vue
| +--minecraft-java-edition-1-client.md
| +--minecraft-java-edition-1-client.vue
| +--minecraft-java-edition-2-windows-server.md
| +--minecraft-java-edition-2-windows-server.vue
| +--minecraft-java-edition-3-linux-server.md
| +--minecraft-java-edition-3-linux-server.vue
| +--nuxtjs-markdown-heroku.md
| +--nuxtjs-markdown-heroku.vue
| +--obs-studio.md
| +--obs-studio.vue
| +--powershell-network-settings.md
| +--powershell-network-settings.vue
| +--powershell-storagepool.md
| +--powershell-storagepool.vue
| +--sumatakyo-rope-bridge.md
| +--sumatakyo-rope-bridge.vue
| +--windows-photos-high-cpu-usage.md
| +--windows-photos-high-cpu-usage.vue
| +--wsl-rsync-auto-backup.md
| +--wsl-rsync-auto-backup.vue
| +--yamahartx-settings.md
| +--yamahartx-settings.vue
+--plugins
+--static
+--store
+--jsconfig.json
+--nuxt.config.js
+--package-lock.json
+--package.json
+--README.md
nuxt-myexternalhdd
+--articles
| +--about.md
| +--android-text-to-speech-on-windows.md
| +--auto-speedtest.md
| +--chrome-firefox-settings.md
| +--diy-microphone-xcm6035.md
| +--diy-shelf-desk.md
| +--dtv-edcb-twitter.md
| +--dtv-ffmpeg-encode.md
| +--dtv-hardware-driver.md
| +--dtv-tvtest-edcb.md
| +--ffmpeg.md
| +--how-to-use-aviutl.md
| +--low-price-external-hdd-wd100emaz.md
| +--make-delicious-latte-at-home-with-makinetta.md
| +--minecraft-java-edition-1-client.md
| +--minecraft-java-edition-2-windows-server.md
| +--minecraft-java-edition-3-linux-server.md
| +--nuxtjs-markdown-heroku.md
| +--obs-studio.md
| +--powershell-network-settings.md
| +--powershell-storagepool.md
| +--sumatakyo-rope-bridge.md
| +--windows-photos-high-cpu-usage.md
| +--wsl-rsync-auto-backup.md
| +--yamahartx-settings.md
+--assets
+--components
+--dist
+--layouts
| +--default.vue
+--middleware
+--node_modules
+--pages
| +--blog
| | +--_post.vue
| | +--index.vue
| +--index.vue
+--plugins
+--static
+--store
+--jsconfig.json
+--nuxt.config.js
+--package-lock.json
+--package.json
+--README.md
下記の記事をかなり参考にさせて頂きました。感謝です。
Building a static blog with NuxtJs and Markdown as a beginner - Nicolò Rebughini
GitHub - nirebu/nirebu-2019: My personal website, built as a static Server Side Rendered Nuxt JS App
Build a Blog with Nuxt and Markdown | Greg Ives
Create a frontmatter Markdown powered Blog with Nuxt.JS
Markdownの用意 見出しにジャンプ
上のディレクトリ構造の通り、articles/*.mdを作成するなり、既存のMarkdownをarticles/へ持ってくる。
front-matterと組み合わせて使う場合のMarkdownの構文サンプル
---
title: Nuxt.jsでGitなブログのつくりかた
description: SEOに影響するそうなんで端的な文章にしておきましょう
author: shibanyan_1
ogimg: 'https://nyanshiba.com/ogpimage.png'
ctime: 2020-05-14
mtime: 2020-05-14
---
# Nuxt.jsでGitなブログのつくりかた
まだ執筆途中の記事などは.gitignoreで除外すれば良い。ローカルにはあるがgitからは無視されるので、pushされない。
# nyanshiba
articles/nuxtjs-markdown-heroku.md
git - Adding Only Untracked Files - Stack Overflow
frontmatter-markdown-loaderのインストール 見出しにジャンプ
上にあるような記法で、SEOやSNSでの共有に欠かせないmetaやOGPに使用する情報を、Markdown内に定義できるようにするのがfrontmatter。
これがないと、それらを定義する為にmdと一緒に都度vueを用意しないといけなくなる。
独自規格とは言え、多くのプラットフォームで使用されているので負債にならないと見込んで採用した。
npm install frontmatter-markdown-loader
tsutils@3.17.1 requires a peer of typescript@>=2.8.0 || >= 3.2.0-dev || >= 3.3.0-dev || >= 3.4.0-dev || >= 3.5.0-dev || >= 3.6.0-dev || >= 3.6.0-beta || >= 3.7.0-dev || >= 3.7.0-beta but none is installed. You must install peer dependencies yourself.
javascript - npm WARN ... requires a peer of ... but none is installed. You must install peer dependencies yourself - Stack Overflow
tsutils@3.17.1がtypescript@何れかのバージョンを必要としているっぽいので
npm install --save-dev typescript
してからリトライ。
ここではMarkdownのパースは行わず、文字列を流すようにnuxt.config.jsを編集して設定します。
export default {
...
/*
** Build configuration
*/
build: {
/*
** You can extend webpack config here
*/
extend(config, ctx) {
config.module.rules.push({
test: /\.md$/,
use: ['raw-loader']
});
}
},
@nuxtjs/markdownitをやめてmarkdown-itを使う 見出しにジャンプ
pages/blog/_post.vueを作成し、下記を記述する。
requireされているが、nuxtjs/markdownitでMarkdownで執筆できるようにするでmarkdown-it、frontmatter-markdown-loaderのインストールでfront-matterのインストールは済んでいる。
<template>
<!-- ルーティング -->
<div :key="$route.params.post">
<!-- export defaultのreturnから貰ったHTMLにパースされた本文を表示 -->
<div v-html="content" class="blog-content"></div>
</div>
</template>
<script>
const fm = require("front-matter") //front-matterを使うよ!
var md = require("markdown-it")({ //markdown-itを使うよ!
html: true, //htmlを返す
linkify: true, //[]()や<a href=してないがリンクっぽいものを自動でリンク化
breaks: false, //自動改行を無効化 ダメ人間になりそうなので
})
export default {
async asyncData({ params }) {
const fileContent = await import(`~/articles/${params.post}.md`); //動的にMarkdownファイルを取ってくる
let res = fm(fileContent.default); //front-matterで前処理して
return {
content: md.render(res.body), //front-matterから貰ったfrontmatter以外の本文だけをmarkdown-itでHTMLにパース
};
},
}
</script>
meta・OGP・faviconの設定 見出しにジャンプ
所謂SEO対策でmetaにtitleやdescription、Twitter等で共有された時のOGPの設定を行う。
ブログ全体のmetaの既定値はnuxt.config.jsのhead:を編集する
export default {
mode: 'universal',
/*
** Headers of the page
*/
head: {
title: '俺の外付けHDD',
titleTemplate: '%s - 俺の外付けHDD',
meta: [
{ charset: 'utf-8' },
{ name: 'viewport', content: 'width=device-width, initial-scale=1' },
//{ hid: 'description', name: 'description', content: '私の脳のバックアップデータ。PCやスマホ、映像、音響、プログラムなど様々なガジェット関係のライフハックをお届けします。' },
{ hid: 'og:site_name', property: 'og:site_name', content: '俺の外付けHDD' },
//{ hid: 'og:type', property: 'og:type', content: 'website' },
//{ hid: 'og:title', property: 'og:title', content: '俺の外付けHDD' },
//{ hid: 'og:url', property: 'og:url', content: 'https://nyanshiba.com/' },
//{ hid: 'og:description', property: 'og:description', content: '私の脳のバックアップデータ。PCやスマホ、映像、音響、プログラムなど様々なガジェット関係のライフハックをお届けします。' },
//{ hid: 'og:image', property: 'og:image', content: 'https://nyanshiba.com/ogpimage.png' },
{ name: 'twitter:card', content: 'summary_large_image' },
{ name: 'twitter:site', content: '@shibanyan_1' },
{ name: 'twitter:creator', content: '@shibanyan_1' }
],
link: [
{ rel: 'apple-touch-icon', sizes: '180x180', href: '/apple-touch-icon.png' },
{ rel: 'icon', type: 'image/png', sizes: '32x32', href: '/favicon-32x32.png' },
{ rel: 'icon', type: 'image/png', sizes: '16x16', href: '/favicon-16x16.png' },
{ rel: 'manifest', href: '/manifest.json' },
]
},
meta:の設定が反映されているかは、http://localhost:3000/にアクセスしてデベロッパーツールで<head>を見れば良い。

それぞれのプラットフォームに合った解像度のファビコンを https://realfavicongenerator.net/ を用いて生成するのが楽。
site.webmanifestはmanifest.jsonにリネームする。
記事毎のmetaの動的な設定はpages/blog/_post.vueで行う。
<script>
const fm = require("front-matter")
var md = require("markdown-it")({
html: true,
linkify: true,
breaks: false,
})
export default {
async asyncData({ params }) {
const fileContent = await import(`~/articles/${params.post}.md`);
let res = fm(fileContent.default);
return {
attributes: res.attributes,
content: md.render(res.body),
};
},
head () {
const title = this.attributes.title
return {
title,
meta: [
{ name: 'description', content: `${this.attributes.description}` },
{ name: 'creation date', content: `${this.ctime}` },
{ name: 'date', content: `${this.mtime}` },
{ property: 'og:site_name', content: '俺の外付けHDD' },
{ property: 'og:type', content: 'article' },
{ property: 'og:title', content: title },
{ property: 'og:description', content: `${this.attributes.description}` },
{ property: 'og:url', content: 'https://nyanshiba.com' + `${this.$route.path}` },
{ property: 'og:image', content: `${this.attributes.ogimg}` }
]
}
},
}
</script>
記事毎に設定が反映されているかは、http://localhost:3000/にアクセスしてデベロッパーツールで<head>を見れば良い。
設定ができたら、Twitterカード検証ツールで確認・強制インデックスさせる。
これを行わないと、OGPの設定が正しくても反映されない場合がある。
Card Validator | Twitter Developers

API: head メソッド - NuxtJS
API: head プロパティ - NuxtJS
アセット - NuxtJS
Nuxt.js で title タグや meta タグを設定する - Qiita
nuxt.js(v2)でSEOに必要なmeta(OGP)を入れたい - Qiita
nuxt.js(v2)でSEOに必要なmeta(OGP)で入力漏れの事故をなくす - Qiita
Nuxt.jsとMDLで静的サイトを作る - Qiita
web applications - manifest.json vs manifest.webmanifest - Stack Overflow
Best Practices for Nuxt.js SEO - Vue Mastery - Medium
nuxt_blog_template/nuxt.config.js at master · urawa72/nuxt_blog_template
Nuxt.jsでOGP用のtitle/metaタグを設定する簡潔なコード | blog.ttskch
Summary with large image — Twitter Developers
リンクシェアの画像 - シェア機能
公開日時・更新日時への対応 見出しにジャンプ
front-matterに記述したctime, mtimeをそれぞれ公開日時creation date, 更新日時dateに対応させる。
日付の整形にmomentを使用しているのでインストールする。
npm install @nuxtjs/moment
nuxt.config.jsのmodules:に追記
export default {
...
/*
** Nuxt.js modules
*/
modules: [
['@nuxtjs/moment', ['ja']], //日本時間として扱う
],
ついでに執筆者authorにも対応させている。
pages/blog/_post.vue
<template>
<div :key="$route.params.post">
<div class="attributes">
<!--export defaultからreturnされた値を表示する-->
<div>🖋️{{ ctime }} 🔄{{ mtime }}</div>
<div>by {{ attributes.author }}</div>
</div>
<div v-html="content" class="blog-content"></div>
</div>
</template>
<script>
const fm = require("front-matter")
const moment = require("moment") //日付処理にmomentを使うよ!
var md = require("markdown-it")({
html: true,
linkify: true,
breaks: false,
})
export default {
async asyncData({ params }) {
const fileContent = await import(`~/articles/${params.post}.md`);
let res = fm(fileContent.default);
return {
attributes: res.attributes,
ctime: moment(res.attributes.ctime).format("YYYY-MM-DD"), //front-matterから受け取った日付時刻をISO 8601形式に整形
mtime: moment(res.attributes.mtime).format("YYYY-MM-DD"),
content: md.render(res.body),
};
},
...
}
</script>
https://developers.google.com/search/docs/data-types/article
https://developer.mozilla.org/ja/docs/Web/HTML/Element/time
日本語対応の見出しと目次 見出しにジャンプ
#### 日本語対応の見出しと目次
と書いたら
<h4 id="日本語対応の見出しと目次">日本語対応の見出しと目次 <a class="header-anchor" href="#日本語対応の見出しと目次">#</a></h4>
となってもらわないと困りますよね。
困るんですよ。これが出来なくなるので。

困るでしょ。必須だと思うんです。
-
しかし、どうやら現在進行形のIssueのようで、手を加えないと対応させられなさそう。
Header anchors [needs discussion] · Issue #28 · markdown-it/markdown-it
-
因みに、markdown-it-toc - npmだけでは、リンクが数字やアンダースコアになってしまい、思うようにならなかったので却下。
日本語に対応したh1,h2,h3...見出しのパースと、それに合ったTOCが必要。
-
@nuxtjs/markdownitにmarkdown-it-anchor、(uslug、)markdown-it-toc-done-rightを組み合わせたやり方は上手くいかなかった。
markdown-itにmarkdown-it-anchor、markdown-it-table-of-contentsの組み合わせは動作した。
npm install markdown-it-anchor markdown-it-table-of-contents
<script>
const fm = require("front-matter")
const moment = require("moment")
const hljs = require('highlight.js')
const anchor = require('markdown-it-anchor') //見出しに使うよ!
const toc = require('markdown-it-table-of-contents') //TOCに使うよ!
var md = require("markdown-it")({
html: true,
linkify: true,
breaks: false,
})
md
.use(anchor, {
level: 2, //h2からidとリンクを付ける
permalink: true, //見出しの横にリンクを設ける
permalinkSymbol: "#", //見出しの横のリンクの文字を設定
})
.use(toc, {
slugify: anchor.defaults.slugify, //markdown-it-anchorのslugでパースする
includeLevel: [2, 3, 4, 5, 6], //h2からh6まで目次に含める
})
export default {
...
}
</script>
highlight.jsでシンタックスハイライト 見出しにジャンプ
こちらもmarkdown-itと組み合わせるのでvue-highlightjsではなくhightlight.jsを使用する。
npm install highlight.js
下記のようなエラーが出たらTypeScriptのインストールを行ってから再度実行。
npm WARN tsutils@3.17.1 requires a peer of typescript@>=2.8.0 || >= 3.2.0-dev || >= 3.3.0-dev || >= 3.4.0-dev || >= 3.5.0-dev || >= 3.6.0-dev || >= 3.6.0-beta || >= 3.7.0-dev || >= 3.7.0-beta but none is installed. You must install peer dependencies yourself.
ハイライトに使用するCSSをhighlight.js demoを参考に選択する。
ls node_modules/highlight.js/styles/
export default {
...
/*
** Global CSS
*/
css: [
{
src: '~/node_modules/highlight.js/styles/vs2015.css', //VSCodeに近いものを選んだ
lang: 'css'
}
],
GitHub - markdown-it/markdown-it #Syntax highlighting
<script>
const fm = require("front-matter")
const moment = require("moment")
const hljs = require('highlight.js')
const anchor = require('markdown-it-anchor')
const toc = require('markdown-it-table-of-contents')
var md = require("markdown-it")({
html: true,
linkify: true,
breaks: false,
langPrefix: 'hljs language-',
highlight: function (str, lang) {
if (lang && hljs.getLanguage(lang.split(':')[0])) {
try {
return '<pre class="' + lang.split(':')[0] + '" name="' + lang.split(':')[1] + '"><code>' + hljs.highlight(lang.split(':')[0], str, true).value + '</code></pre>';
} catch (__) {}
}
return '<pre class="hljs"><code>' + md.utils.escapeHtml(str) + '</code></pre>';
}
})
...
</script>
preのclassはlang.split(':')[0]、nameにlang.split(':')[1]が入るようになっているので、
```html:pages/blog/_post.vue
<script>
var md = require("markdown-it")({
html: true,
linkify: true,
breaks: false,
langPrefix: 'hljs language-',
highlight: function (str, lang) {
if (lang && hljs.getLanguage(lang.split(':')[0])) {
try {
return '<pre class="' + lang.split(':')[0] + '" name="' + lang.split(':')[1] + '"><code>' + hljs.highlight(lang.split(':')[0], str, true).value + '</code></pre>';
} catch (__) {}
}
return '<pre class="hljs"><code>' + md.utils.escapeHtml(str) + '</code></pre>';
}
})
```
というQiita的な言語:ファイル名表記を可能にしている
参考: #pre
シェアボタン 見出しにジャンプ
Nuxtで制作したページにSNSウィジェットを埋め込む|ふるくらむ|noteを参考にさせて頂きました。
<template>
<div :key="$route.params.post">
<div class="attributes">
<div>🖋️{{ ctime }} 🔄{{ mtime }}</div>
<div>by {{ attributes.author }}</div>
</div>
<div class="social">
<a
:href="linkedinUrl()"
target="_blank"
title="LinkedInで共有"
><b style="background-color:#0073b1">in</b></a>
<a
:href="twitterUrl()"
target="_blank"
title="Twitterで共有"
><svg><!--Twitterのアイコンを拾ってくる--></svg></a>
<a
:href="hatebuUrl()"
target="_blank"
:data-hatena-bookmark-title="encodeURIComponent(url)"
title="このエントリーをはてなブックマークに追加"
><b style="background-color:#00a4de">B!</b></a>
<a
:href="lineUrl()"
target="_blank"
title="LINEで共有"
><svg><!--LINEのアイコンを拾ってくる--></svg></a>
<a
:href="pocketUrl()"
target="_blank"
title="pocketで共有"
><svg><!--Pocketのアイコンを拾ってくる--></svg></a>
</div>
<div v-html="content" class="blog-content"></div>
</div>
</template>
<script>
const fm = require("front-matter")
...
export default {
async asyncData({ params }) {
const fileContent = await import(`~/articles/${params.post}.md`);
let res = fm(fileContent.default);
return {
attributes: res.attributes,
ctime: moment(res.attributes.ctime).format("YYYY-MM-DD"),
mtime: moment(res.attributes.mtime).format("YYYY-MM-DD"),
content: md.render(res.body),
};
},
head () {
const title = this.attributes.title
return {
title,
meta: [...]
}
},
data () {
return {
url: `https://nyanshiba.com${this.$route.path}`,
linkedin_url: 'https://www.linkedin.com/shareArticle?url={0}&title={1}',
twitter_url: 'https://twitter.com/intent/tweet?url={0}&text={1}',
hatebu_url: 'http://b.hatena.ne.jp/add?mode=confirm&url={0}&title={1}',
line_url: 'https://social-plugins.line.me/lineit/share?url={0}',
pocket_url: 'http://getpocket.com/edit?url={0}'
}
},
methods: {
formatByArr (msg) {
// フォーマット(引数可変(配列)版)
let args = []
for (let i = 1; i < arguments.length; i++) {
args[i - 1] = arguments[i]
}
// URLエンコード
args = args.map(x => encodeURIComponent(x))
return msg.replace(/\{(\d+)\}/g, function (m, k) {
return args[k]
})
},
// それぞれパラメータを埋め込む
linkedinUrl () {
return this.formatByArr(this.linkedin_url, this.url, this.attributes.title)
},
twitterUrl () {
return this.formatByArr(this.twitter_url, this.url, this.attributes.title)
},
hatebuUrl () {
return this.formatByArr(this.hatebu_url, this.url, this.attributes.title)
},
lineUrl () {
return this.formatByArr(this.line_url, this.url, this.attributes.title)
},
pocketUrl () {
return this.formatByArr(this.pocket_url, this.url)
}
}
};
</script>
記事一覧 見出しにジャンプ
nuxt-myexternalhdd
+--articles
| +--*.md
+--pages
| +--blog
| | +--_post.vue <- Markdown担当
| | +--index.vue <- 記事一覧ページ
| +--index.vue <- トップページ
<template>
<div>
<h1>記事一覧</h1>
<ul>
<li v-for="post in posts" :key="post.name"> <!-- 箇条書きを生成 -->
<a :href="post.link">{{ post.name }}</a>
</li>
</ul>
</div>
</template>
<script>
export default {
async asyncData () {
const resolve = await require.context('~/articles/', true, /\.md$/) // articles/*.mdを取得
const imports = resolve.keys().map((path) => {
const name = path.match(/([^/]*)(?:\.([^.]+$))/)[1] // ./filename.md -> filename
return {
link: '/blog/' + name, // filename -> /blog/filename
name // filename
}
})
return {
posts: imports // <template />で使う
}
}
}
</script>
v-for :keyの意味
リストレンダリング — Vue.js
vueでファイル名一覧を取得できる
Webpackでフォルダ内の全ファイルを一気にrequireする - Qiita
HTML・CSS構造 見出しにジャンプ
特に何も指定していなければlayouts/default.vueに記述されたHTML・CSSが適用される。
API: The layout Property - NuxtJSにあるように、HTML・CSS構造を分けて指定することもできる。
nuxt-myexternalhdd
+--layouts
| +--default.vue <- 既定のHTML・CSS
| +--post.vue <- _post.vueで指定する(例)
<script>
export default {
layout: 'blog',
// OR
layout (context) {
return 'blog'
}
}
</script>
ただ、<template>や<style>はlayouts/*.vueだけでなくpages/blog/_post.vue自身にも書けるので、使いやすいところに書けば良いと思うし、
俺の外付けHDDではdefault.vueに書いてしまってる。
ここに当ブログで使用しているlayouts/default.vueを置いておく。
以下ここから要点をかいつまんで解説する。
font 見出しにジャンプ
html {
font: 400 16px -apple-system, BlinkMacSystemFont, 'Segoe UI', Roboto, 'Helvetica Neue', Arial, sans-serif;
...
フォントはほぼ既定の状態で、異様に太ったり細くなったりしないものを選んだ。
また、fontでfont-weightやfont-sizeを一括指定している。
https://developer.mozilla.org/ja/docs/Web/CSS/font
リンクの色 見出しにジャンプ
* a {
margin: 0 .2em;
padding: 0 .2em;
color: #0366d6;
text-decoration: none;
}
* a:hover {
background-color: #0366d6;
color: #f2f3f4;
border-radius: .2em;
}
リンクはUIフレームワークを使ってる"風"な色に、
そして、マウスオーバー時には全体が青くなるようにした。
あと少し両サイドにmarginあるよね、良いでしょこれ。
ナビゲーションバー 見出しにジャンプ
<template>
<div>
<div class="nav">
<a href="/">俺の外付けHDD</a>
<a href="/blog">Blog</a>
<a href="/blog/about">About</a>
<a href="/blog/about#お問い合わせ">Contact</a>
...
</div>
<div class="main">
...
</div>
<div class="nav">
<a href="/">俺の外付けHDD</a>
<a href="/blog">Blog</a>
<a href="/blog/about">About</a>
<a href="/blog/about#お問い合わせ">Contact</a>
...
</div>
<div class="copyright">
</div>
</div>
</template>
<style>
...
.nav {
display: flex;
justify-content: flex-end; /* 右寄せ */
flex-wrap: wrap; /* はみ出たら折り返す */
align-items: center; /* 縦方向中央揃え */
font-weight: 300;
background-color: #35495e;
padding: .5em 0;
}
.nav > * {
padding: 0;
}
.nav > *:nth-of-type(2) {
margin-left: auto;
}
.nav a {
padding: .5rem;
color: #f2f3f4;
}
.nav a:first-child {
font-size: 2em;
}
...
タイトルとリンクが同列のaになっているが、特にclass名は振らずに、:first-childなどのセレクタで補っている。
flex下のn番目の要素にmargin-left: auto;すると左右に寄ってくれる。
ナビゲーションバーは末尾のフッター代わりにも使っている。
display:flex 見出しにジャンプ
<template>
<div>
<div class="nav" />
<div class="main">
<div class="dummy" />
<nuxt />
<div class="sub" />
</div>
...
</template>
<style>
...
.main {
position: relative; /* absoluteの親 */
display: flex;
flex-wrap: wrap; /* レスポンシブ */
justify-content: center; /* 中央寄せ */
background-color: #f2f3f4;
max-width: 100%;
min-height: 90vh; /* コンテンツがない時に末尾に余白ができないように */
}
.main .dummy {
display: none;
}
@media (min-width: 1300px) {
.main .dummy {
display: block;
flex: 1 0 200px;
margin: 1em;
}
}
.main > div:not([class]) {
display: block;
margin-top: 1em;
padding-bottom: 1em;
width: 100%;
background-color: #fff;
box-shadow: 2px 2px 8px #ccc;
}
@media (min-width: 960px) {
.main > div:not([class]) {
flex: 0 0 60%;
max-width: 60%;
margin: 1em;
}
}
.main .sub {
display: block;
flex: 1 0 200px;
margin: 1em;
}
ナビゲーションバーでも使っているが、当ブログのレイアウトの基本になっている。
display: flexはとても書きやすく、今時殆どのブラウザで対応しているので採用した。

スマホ表示では、記事は幅いっぱいに表示される。
画面の幅がある程度min-width: 960px大きくなったら、flex-basisを%指定に変えて、サイドバーで適度な大きさになるようにする。
画面サイズが十分に大きいときmin-width: 1300pxは、記事が画面中央になるように、ダミー要素.dummyを.sub同様に表示して横並びの要素を2つから3つに増やして位置調整する。
微妙な実装なので悪しからず。
A Complete Guide to Flexbox | CSS-Tricks
Flexboxを使う時に覚えておきたい!固定幅と可変幅を組み合わせたレイアウトを簡単に実装する方法 | コリス
html - Center and right align flexbox elements - Stack Overflow
CSSフレックスボックス(display:flex)の使い方 無料ホームページ作成クラウドサービス まめわざ
img 見出しにジャンプ
img loading="lazy"な画像
<img loading="lazy" width="16" height="9" alt="OBS" src="/image/obs-studio/obsthumb1.jpg">
が読み込まれる度にガクガクとレイアウトシフトが発生しないようにする。
.blog-content > img {
width: 100%;
height: auto;
margin-bottom: 1em;
}
【2020年夏】imgタグにはwidthとheight属性を書くのがいいらしい | Rriver
pre 見出しにジャンプ
pre,
code,
.gist {
font-family: 'Monaco', 'Consolas', 'Courier New', Courier, monospace, sans-serif;
}
pre,
.hljs {
position: relative;
word-wrap: normal; /* スマホ実機での改行が行われないので */
max-height: 60vh; /* 高さ制限 */
overflow: auto; /* 必要なら自動でスクロールバーを表示 */
padding: 1.2em;
background-color: #1e2a36;
}
pre {
padding-top: 2em;
color: #f2f3f4;
}
pre code {
background-color: #1e2a36;
}
pre * {
color: #f2f3f4;
}
pre:not([class])::before {
display: none;
}
pre[class]:not(.hljs)::before,
pre[name]:not([name="undefined"])::after {
position: absolute;
top: 0;
left: 0;
padding: .3em .9em;
display: block;
color: #f2f3f4;
background-color: #243444;
box-shadow: 4px 4px 8px #161e25;
content: attr(class); /* hightlight.jsから渡された言語名を表示 */
}
pre[name]:not([name="undefined"])::after {
content: attr(name); /* hightlight.jsから(カスタム処理により)渡されたファイル名を表示 */
}
プログラムを書いて記事にする機会が多いので、pre, code, .gist(GitHub Gist)に関する部分は作りこんだ。
Markdownパーサが使用するhighlight.jsをカスタムした上で、下記の様にMarkdownを記述すると
```html:layouts/default.vue
<template>
<div>
<div class="nav" />
<div class="main">
<div class="dummy" />
<nuxt />
```
このようになる。
<template>
<div>
<div class="nav" />
<div class="main">
<div class="dummy" />
<nuxt />
スマホ実機で<pre>内テキストが自動改行され、overflow: auto;が効かない件 | ma-ya's CREATE / WEB DESIGN
code 見出しにジャンプ
p code,
li > code {
margin: 0 .2em;
padding: 0 .2em;
background-color: #f2f3f4;
border: 1px solid #ddd;
border-radius: .2em;
}
pre下にもcodeがあるので干渉しないようにセレクタを指定している。
aと同様、前後にmarginを設けて可視性を上げている。
gist 見出しにジャンプ
.gist * {
border: none!important;
border-radius: 0!important;
}
.gist-data {
max-height: 60vh; /* 高さ制限 */
overflow: auto; /* 必要なら自動でスクロールバーを表示 */
padding: 1em 0;
background-color: #1e2a36!important;
}
.gist .highlight {
background-color: #1e2a36!important;
}
.gist .blob-code-inner {
font-size: .9rem!important;
color: #DCDCDC!important;
}
body .gist .pl-k,
body .gist .pl-c1 {
color: #569CD6;
}
body .gist .pl-s,
body .gist .pl-pds,
body .gist .pl-s .pl-pse .pl-s1,
body .gist .pl-sr,
body .gist .pl-sr .pl-cce,
body .gist .pl-sr .pl-sre,
body .gist .pl-sr .pl-sra {
color: #ce9178;
}
body .gist .pl-c {
color: #57A64A;
font-style: italic;
}
body .gist .pl-smi,
body .gist .pl-s .pl-s1,
body .gist .pl-e {
color: #9CDCFE;
}
body .gist .pl-s .pl-v,
body .gist .pl-en {
color: #DCDCAA;
}
GitHub Gistを貼り付けた時のCSS。
gist側のCSSと競合する場合は、やむなく!importantで上書きしている。
シンタックスハイライトはVSCodeのDark+テーマ%LOCALAPPDATA%\Programs\Microsoft VS Code\resources\app\extensions\theme-defaults\themes\dark_plus.jsonを参考に配色した。
埋め込み 見出しにジャンプ
はてなブログには[https://example.com:embed:cite]でサムネイル画像やタイトルと一緒に記事を埋め込む機能がありましたが、もちろんここにはないので自分で実装する必要があります。
Amazonアソシエイト 見出しにジャンプ
このように記述すると
<div class="embed">
<a href="https://www.amazon.co.jp/exec/obidos/ASIN/B081BVF3DH/nyanshiba00-22/" target="_blank">
<img loading="lazy" src="https://images-na.ssl-images-amazon.com/images/I/51p9CAwdwAL._AC_SX679_.jpg" alt="RME USB オーディオインターフェイス Babyface Pro FS 【国内正規品】">
<p>RME USB オーディオインターフェイス Babyface Pro FS 【国内正規品】</p>
</a>
</div>
blockquote,
.embed a {
display: block;
max-width: 100%;
margin: 1em 0;
padding: 1em;
border-left: 6px solid #35495e;
box-shadow: 4px 4px 8px #ccc;
font-weight: bold;
}
.embed a:hover {
background-color: #fff;
border-color: #526488;
box-shadow: 1px 1px 2px #ccc;
border-radius: 0;
}
.embed a::after {
display: block;
content: attr(href);
text-align: right;
color: #ccc;
}
.embed a p,
.embed a img {
display: inline;
vertical-align: middle;
}
.embed img {
max-height: 160px;
}
こうなります。
ただ、これらを毎回記述するのは骨が折れるので、ブックマークレットで自動化します。
Amazonの商品ページで実行すると、埋め込み用HTMLが生成されます。
AmazonアソシエイトのIDは適宜自分のものに変更して下さい。
javascript: (function () {
alert('<div class="embed">\n' + ' <a href="https://www.amazon.co.jp/exec/obidos/ASIN/' + document.getElementById('ASIN').value + '/nyanshiba00-22/" target="_blank">\n' + ' <img loading="lazy" src="' + document.getElementById('landingImage').src + '" alt="' + document.getElementById('landingImage').alt + '">\n' + ' <p>' + document.getElementById('landingImage').alt + '</p>\n' + ' </a>\n' + '</div>');
})()
YouTubeを16:9で埋め込む 見出しにジャンプ
YouTubeの埋め込みを記事幅いっぱいに16:9の縦横比で表示できるよう、<div class="ytwrapper"/>で囲みます。
<div class="ytwrapper">
<iframe src="https://www.youtube-nocookie.com/embed/cjxSJFoY2nU?controls=0" frameborder="0" allow="accelerometer; autoplay; encrypted-media; gyroscope; picture-in-picture" allowfullscreen></iframe>
</div>
.ytwrapper {
position: relative;
padding-bottom: 56.25%;
height: 0;
overflow: hidden;
}
.ytwrapper iframe {
position: absolute;
top: 0;
left: 0;
width: 100%;
height: 100%;
}
こうなります。
jquery - creating a 16:9 aspect ratio iframe based on browser size (percentage) - Stack Overflow
robots.txt 見出しにジャンプ
staticディレクトリにrobots.txtを作成して、下記を記述します。
This directory contains your static files.
Each file inside this directory is mapped to `/`.
Thus you'd want to delete this README.md before deploying to production.
Example: /static/robots.txt is mapped as /robots.txt.
More information about the usage of this directory in the documentation.
User-agent: *
Sitemap: https://nyanshiba.com/sitemap.xml
robots.txt ファイルを作成する - Search Console ヘルプ
Robots.txt の仕様 | Google 検索デベロッパー ガイド | Google Developers
sitemap.xml 見出しにジャンプ
記事一覧のようにrequire.contextでroutes:に渡すリストをつくるやり方が分からんので手動。
ファイル名が欲しいだけなのに、axiosで引っ張ってくる理由があるのか...?
API: The generate Property - NuxtJS
npm install @nuxtjs/sitemap
export default {
...
/*
** Nuxt.js modules
*/
modules: [
['@nuxtjs/sitemap', {
path: '/sitemap.xml',
}]
],
generate: {
routes: [
'/',
'/blog/about',
'/blog/auto-speedtest',
'/blog/chrome-firefox-settings',
'/blog/dtv-edcb-twitter',
'/blog/dtv-ffmpeg-encode',
'/blog/dtv-hardware-driver',
'/blog/dtv-tvtest-edcb',
'/blog/how-to-use-aviutl',
'/blog/low-price-external-hdd-wd100emaz',
'/blog/make-delicious-latte-at-home-with-makinetta',
'/blog/minecraft-java-edition-1-client',
'/blog/minecraft-java-edition-2-windows-server',
'/blog/minecraft-java-edition-3-linux-server',
'/blog/obs-studio',
'/blog/powershell-network-settings',
'/blog/powershell-storagepool',
'/blog/sumatakyo-rope-bridge',
'/blog/windows-photos-high-cpu-usage',
'/blog/wsl-rsync-auto-backup',
'/blog/yamahartx-settings',
]
}
Google Analytics 見出しにジャンプ
npm install @nuxtjs/google-analytics
export default {
...
/*
** Nuxt.js modules
*/
modules: [
["@nuxtjs/google-analytics", {
id: "UA-XXXXXXXXX-X"
}]
],
Google Search Console 見出しにジャンプ
export default {
mode: 'universal',
/*
** Headers of the page
*/
head: {
title: '俺の外付けHDD',
titleTemplate: '%s - 俺の外付けHDD',
meta: [
{ name: 'google-site-verification', content: 'H0dePfOBeJne6vWeWhELp9ya0dWT5ZcqrwgEJz-hi8o' },
...
],
},
Google AdSense 見出しにジャンプ
npm install @nuxtjs/google-adsense
export default {
...
/*
** Nuxt.js modules
*/
modules: [
['@nuxtjs/google-adsense',
{
id: 'ca-pub-XXXXXXXXXXXXXXXX' //AdSense コードの data-ad-client
}],
],
Herokuにデプロイ 見出しにジャンプ
Heroku CLIのインストール 見出しにジャンプ
WSLで下記コマンドを実行
sudo snap install --classic heroku
[sudo] password for sbn:
Interacting with snapd is not yet supported on Windows Subsystem for Linux.
This command has been left available for documentation purposes only.
駄目です
cd /tmp
curl https://cli-assets.heroku.com/install-ubuntu.sh | sh
~~
Unpacking heroku (7.39.5-1) ...
Setting up heroku (7.39.5-1) ...
heroku installed to /usr/bin/heroku
heroku/7.39.5 linux-x64 node-v12.16.2
こちらならインストールできました。
The Heroku CLI | Heroku Dev Center
wsl+heroku - 清水川のScrapbox
Heroku CLIコマンド一覧 見出しにジャンプ
heroku
CLI to interact with Heroku
VERSION
heroku/7.40.0 linux-x64 node-v12.16.2
USAGE
$ heroku [COMMAND]
COMMANDS
access manage user access to apps
addons tools and services for developing,
extending, and operating your app
apps manage apps on Heroku
auth check 2fa status
authorizations OAuth authorizations
autocomplete display autocomplete installation
instructions
buildpacks scripts used to compile apps
certs a topic for the ssl plugin
ci run an application test suite on
Heroku
clients OAuth clients on the platform
config environment variables of apps
container Use containers to build and deploy
Heroku apps
domains custom domains for apps
drains forward logs to syslog or HTTPS
features add/remove app features
git manage local git repository for
app
help display help for heroku
keys add/remove account ssh keys
labs add/remove experimental features
local run Heroku app locally
logs display recent log output
maintenance enable/disable access to app
members manage organization members
notifications display notifications
orgs manage organizations
pg manage postgresql databases
pipelines manage pipelines
plugins list installed plugins
ps Client tools for Heroku Exec
psql open a psql shell to the database
redis manage heroku redis instances
regions list available regions for
deployment
releases display the releases for an app
reviewapps manage reviewapps in pipelines
run run a one-off process inside a
Heroku dyno
sessions OAuth sessions
spaces manage heroku private spaces
status status of the Heroku platform
teams manage teams
update update the Heroku CLI
webhooks list webhooks on an app
アップデートの確認 見出しにジャンプ
heroku update
› Warning: update with "sudo apt update && sudo apt install heroku"
heroku: Updating CLI... not updatable
Updating completions... done
パッケージマネージャ側でやれと怒られたので
sudo apt update && sudo apt install heroku
バージョンの確認 見出しにジャンプ
heroku version
heroku/7.41.1 linux-x64 node-v12.16.2
Herokuへのサインアップ・ログイン 見出しにジャンプ
# qで離脱できる
heroku login
heroku: Press any key to open up the browser to login or q to exit:
› Error: quit
# 空EnterでWindows上の既定のブラウザが開く
heroku login
heroku: Press any key to open up the browser to login or q to exit:
Opening browser to https://cli-auth.heroku.com/auth/cli/browser/XXXXXXXXXX
Logging in... done
Logged in as miseraren@example.com

heroku create 見出しにジャンプ
heroku create nuxt-myexternalhdd
Creating app... done, ⬢ whispering-brushlands-97579
https://whispering-brushlands-97579.herokuapp.com/ | https://git.heroku.com/whispering-brushlands-97579.git
ダッシュボードに今回作成したアプリケーションがあれば成功。
【herokuコマンド】createからdestroyまで - Qiita
HerokuでNuxtを自動デプロイさせる設定 見出しにジャンプ
heroku config 見出しにジャンプ
heroku config:set NPM_CONFIG_PRODUCTION=false --app "nuxt-myexternalhdd"
heroku config:set HOST=0.0.0.0 --app "nuxt-myexternalhdd"
heroku config:set NODE_ENV=production --app "nuxt-myexternalhdd"
Nuxt + Herokuで簡単にデプロイする - Qiita
Heroku へデプロイするには? - NuxtJS
[heroku] 環境変数の操作 - Qiita
package.json 見出しにジャンプ
package.jsonに"heroku-postbuild": "npm run build",を追記します。
~~
"scripts": {
"dev": "nuxt",
"build": "nuxt build",
"start": "nuxt start",
"heroku-postbuild": "npm run build",
"generate": "nuxt generate",
"lint": "eslint --ext .js,.vue --ignore-path .gitignore ."
}
~~
Heroku Node.js Support | Heroku Dev Center
git push heroku master 見出しにジャンプ
heroku createの時点でgit push heroku masterできるようになっているので、基本的にgit remote addは必要ない。
git add .
git commit -m "first commit'
git push heroku master
remote: Verifying deploy... done.
To https://git.heroku.com/nuxt-myexternalhdd.git
* [new branch] master -> master
https://アプリケーション名.herokuapp.com でホストされます。
Heroku にある Git リポジトリを楽に remote に設定する - Qiita
Herokuに独自ドメインを設定する 見出しにジャンプ
heroku domains:add nyanshiba.com
heroku domains:wait nyanshiba.com
どうやらクレジットカード情報を入れて認証しろってことらしい(支払いはない)
Adding nyanshiba.com to ⬢ nuxt-myexternalhdd... done
› Error: Please verify your account in order to add domains (please enter a credit card) For more information, see https://devcenter.heroku.com/categories/billing Verify now at https://heroku.com/verify
›
› Error ID: verification_required
Node.jsでのHerokuチュートリアル後編 - Qiita
ドメインの登録が成功したかどうか確認
heroku domains
=== nuxt-myexternalhdd Heroku Domain
nuxt-myexternalhdd.herokuapp.com
=== nuxt-myexternalhdd Custom Domains
Domain Name DNS Record Type DNS Target
nyanshiba.com CNAME miseraren-XXXXXXXXXXXXXX.herokudns.com
Custom Domain Names for Apps | Heroku Dev Center
CloudflareでSSL化 見出しにジャンプ

Cloudflare - The Web Performance & Security Company | Cloudflare を利用して、無料で簡単に独自ドメインでもSSL化する。
- Cloudflareでアカウント・ドメイン登録を済ませてここまで来る

- 下記を参考に自分のドメインやアプリケーション名に置き換えて設定
タイプ
値
名前
TTL
CNAME
nyanshiba.com
nuxt-myexternalhdd.herokuapp.com
自動

-
お使いのドメインレジストラでカスタムネームサーバを登録する。
1.に書かれている2つとも求められると思う。
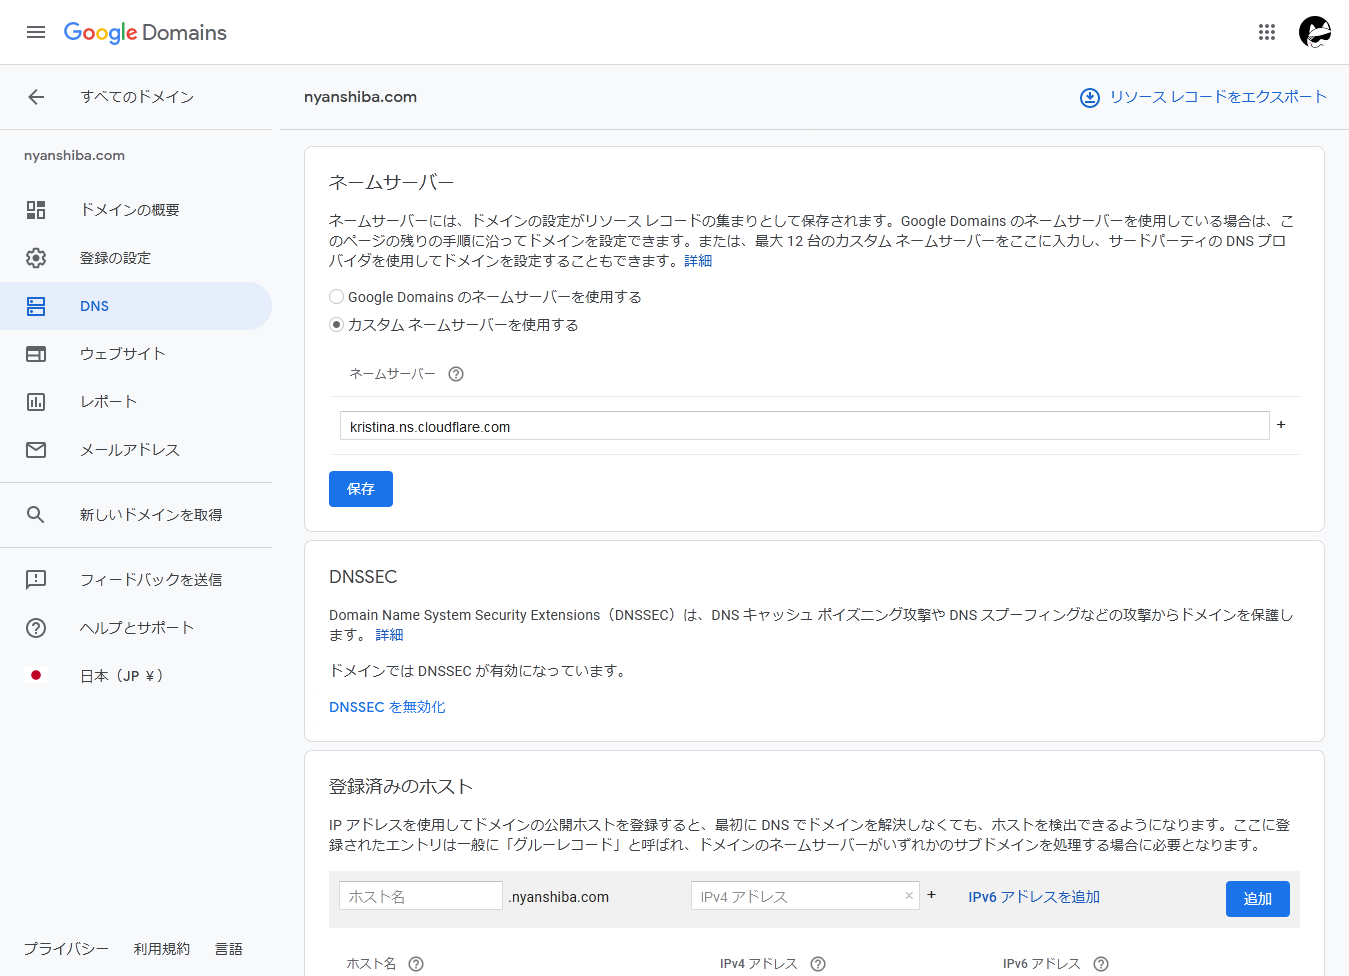
-
一日くらい寝かせたら独自ドメインでアクセスできるようになっていると思う
nyanshiba.com
【完全無料】Herokuで独自ドメイン + HTTPSに対応する【Rails】 - Qiita
【無料】Cloudflareを使ってHerokuで独自ドメインで運用する方法 - Qiita
お名前.comで購入したドメインをHerokuに設定する - Qiita
はてなブログからの移行 見出しにジャンプ
リダイレクト 見出しにジャンプ
うまく動作しなかったので、取り敢えず下記をそれぞれの記事のMarkdown内に貼り付けた。
移行しました
[https://nyanshiba.com/blog/windows-photos-high-cpu-usage:embed:cite]
canonicalの変更 見出しにジャンプ
link.hrefを各記事に合わせて、それぞれの記事のMarkdown内に貼り付けた。
<script type="text/javascript" language="javascript">
var link = document.getElementsByTagName("link")[0];
link.href = "https://nyanshiba.com/blog/windows-photos-high-cpu-usage";
</script>
